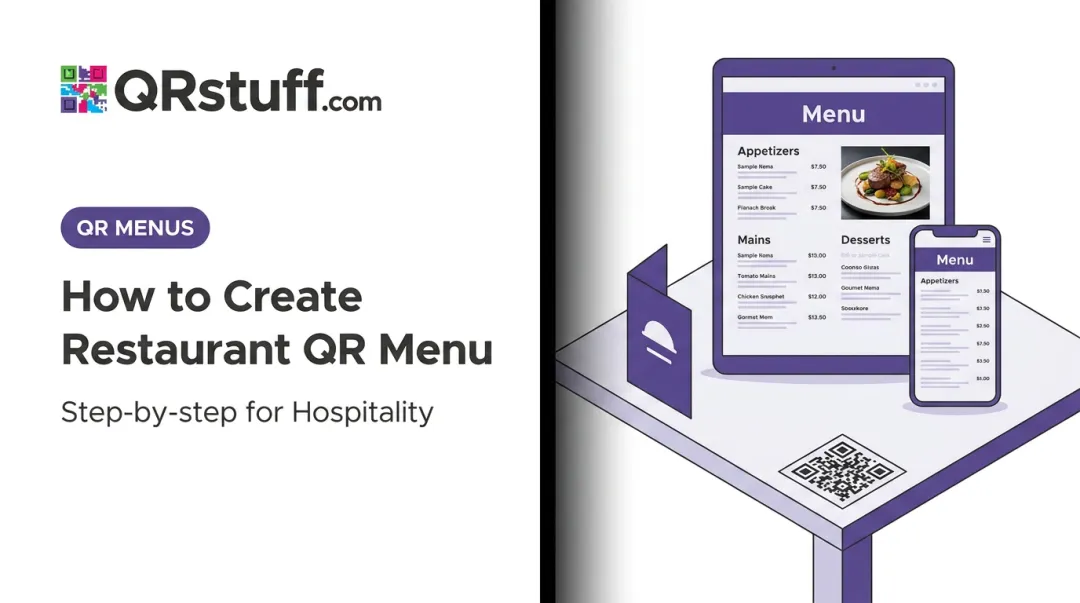
That's where a QR menu changes the math. But "just generate a QR code" advice skips the decisions that determine whether customers actually use it — or ignore it entirely.
This guide covers everything: what to prepare, how to build it step by step, and the placement and durability factors that most first-timers get wrong.
Key Takeaways
- Dynamic QR codes let you update prices, sold-out items, and daily specials without printing a new code
- Have three things ready before you start: menu content, a hosting destination, and a QR code generator account
- Place your QR code where the line forms, not just at the serving window
- Weatherproof your signage — standard paper degrades within days outdoors
- Test on multiple devices and in outdoor lighting before your first event
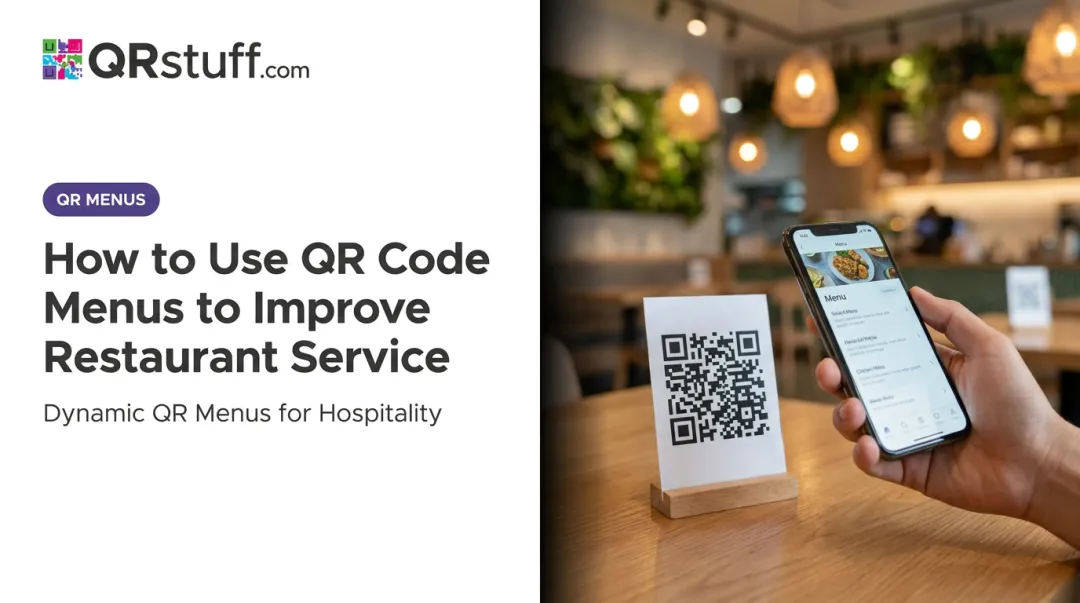
Why QR Menus Work Especially Well for Food Trucks
Traditional menu formats all have the same flaw for food trucks: they're expensive or difficult to update, and they reach customers too late.
- Chalkboards smudge in rain, fade in sun, and can't show photos
- Printed menu boards require a full reprint when a price changes or an item sells out
- Window signage only reaches customers after they've already waited through the entire line
Each of these problems gets worse as your route grows. IBISWorld reported 78,928 U.S. food truck businesses in 2024, up 17% from the prior year — a sector growing fast and competing harder for customer attention.
Consumer adoption supports the shift. The National Restaurant Association's 2024 Restaurant Technology Landscape Report found that 57% of limited-service restaurant customers would use a smartphone to access a menu via QR code. For a format that naturally attracts quick-service, on-the-go diners, that's a substantial share of your existing customer base already onboard.
The practical advantage for food trucks: one dynamic QR code works at every location and event. Print it once on a weatherproof vinyl sticker, and it shows the current menu whether you're at a Saturday farmers market or a Sunday music festival. Update the content behind it anytime — no reprinting required.
What You Need Before Creating Your QR Menu
Preparation determines how fast setup goes. Most delays come from starting a tool before having the right inputs ready.
Menu Content and Assets
Before opening any platform, have these ready:
- Finalized item list with names, descriptions, and current prices
- High-quality photos of at least your 3–5 top-selling dishes
- Allergen and dietary notes (vegan, gluten-free, contains nuts)
- Your truck's logo and brand colors in digital format
A Menu Hosting Destination
The QR code needs to link to something. Your three options:
| Option | Best For | Limitation |
|---|---|---|
| PDF (hosted on Google Drive/Dropbox) | Simple, low-tech setups | Requires re-uploading for every update; poor mobile experience |
| Website page | Full design control | Requires maintenance; slower to update |
| Digital menu platform | Frequent updaters | Fastest to edit; mobile-optimized by default |
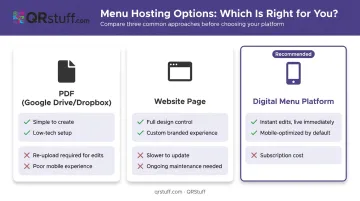
Nielsen Norman Group notes that PDFs are optimized for print, often require pinching and zooming on mobile, and lack internal navigation — worth knowing before defaulting to that format.
A QR Code Generator Account
You need a generator that supports dynamic QR codes — not one-time static generators. With a static code, changing your menu means printing new signage every time — a real problem when you're 86ing items mid-service. That difference is covered in Step 3 below. Choose a platform with a proven track record; a dead QR code during a lunch rush loses you sales you can't recover.
How to Create a QR Menu for Your Food Truck
The full process — from blank page to scannable, deployed QR menu — takes under an hour when your inputs are ready.
Step 1: Finalize and Organize Your Menu Content
Before building anything, decide your structure. Group items into clear categories: Mains, Sides, Drinks, Specials. For food trucks, 10–20 items is the sweet spot — a focused menu reads faster on a phone screen than a sprawling one.
Write short, appetite-driven descriptions rather than bare names. "Smoked brisket sandwich" tells customers nothing. "Slow-smoked 12-hour brisket, house pickles, chipotle aioli on a brioche bun" does the work for you.
Step 2: Build or Upload Your Digital Menu
Match your hosting method to how often you update:
- Update frequently (daily specials, event-based items): Use a dedicated digital menu platform — edits take seconds and go live immediately
- Update occasionally: A well-formatted PDF hosted on Google Drive works, but test how it renders on a phone before committing
- Want full control: A dedicated page on your website, built mobile-first
Whatever you choose, test it on a phone with cellular data before printing a single sign. The majority of your customers will view it on a mobile screen, often on a congested network at a crowded event.
Step 3: Generate a Dynamic QR Code
This is the decision that most first-timers get wrong. There are two types of QR codes:
- Static QR code: The destination URL is permanently encoded into the code. Any change to your menu URL means designing and printing an entirely new code.
- Dynamic QR code: The code points to a short redirect URL. You update the destination freely through a dashboard. The printed code never changes.
For food trucks, static codes are a liability. Dynamic codes are the only practical option.
When choosing a platform to generate your dynamic code, look for one with built-in analytics. QRStuff provides real-time scan data including city-level location, time-of-day breakdowns, and device type — so you can see which events and neighborhoods drive the most scans, and use that to inform where you book next.
Reliability matters too. QRStuff backs its platform with a 99.9% uptime guarantee, which counts for a lot when your QR menu is the only menu at a live event.
Step 4: Customize Your QR Code for Brand Recognition
Don't deploy a plain black-and-white grid. Customization makes your code visually distinctive and signals to customers that it's intentional, not incidental.
What to customize:
- Brand colors in the foreground pattern (avoid red, orange, and yellow — many scanners use red-light detection that reduces contrast with warm tones)
- Logo in the center — QRStuff automatically raises error correction when you add a logo, keeping the code scannable with up to 30% of the surface covered
- Module and corner shapes to match your truck's visual identity
After customizing, test with multiple phone models — both iPhone and Android — before printing anything. Aesthetics mean nothing if the code doesn't scan.
Step 5: Print and Deploy Weatherproof Signage
Standard paper prints degrade within days in outdoor food truck conditions. Sun, rain, and wind will destroy standard paper prints within days.
Materials that work:
- Vinyl stickers (3M's outdoor graphic vinyl is rated for up to 10 years on flat vertical surfaces)
- Laminated prints
- Plastic or acrylic signs
Sizing: The QR code itself should be at least 4–6 inches square for reliable scanning from a few feet away in a queue. For exterior truck signage, 12+ inches works better. Download your code as SVG or high-resolution PNG (300 DPI minimum) to avoid pixelation at large sizes.
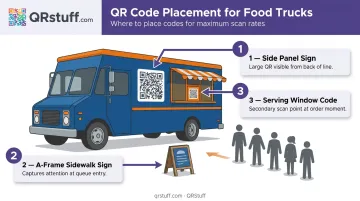
Placement points:
- Large sign on the truck's side, visible from the back of the line
- A-frame sidewalk sign at festival or market setups
- Secondary code at the serving window for late-decision customers
Add a short instruction below each code: "Scan to view our menu." Users need at least 15 seconds to notice, decide to scan, and complete the action — give them that context early.
What Determines Whether Customers Actually Use It
Generating the code is only half the work. Placement, load speed, and content quality determine whether customers scan or ignore it.
Placement: Line Entry, Not Window
The single highest-impact factor. A customer who scans at the back of the line arrives at the window knowing what they want. A code placed only at the window — after the entire wait — creates delay rather than reducing it.
Place codes at eye level, use multiple points for longer lines, and ensure adequate lighting for evening events.
Load Speed
Once a customer scans, you have seconds to hold their attention. Google research found that 53% of mobile site visits are abandoned if a page takes longer than 3 seconds to load. At a crowded outdoor event, cellular networks are under significantly more stress than normal — slow loads and dropped connections are common in dense crowds.
Keep your menu page lean: compressed images, no autoplay video, under 3 seconds on a mobile connection. Test on cellular data specifically, not just your home WiFi.
Photo Quality and Contrast
Research published in the International Journal of Hospitality Management found that adding photos to menu items positively affects customer attitudes and purchase intentions. Focus high-quality photography on your 3–5 signature dishes rather than every item.
Use high-contrast text on your menu page. Light-colored menus are notoriously difficult to read on phone screens in direct sunlight — a standard food truck environment.
Dynamic Updates as an Operational Habit
The real operational value of a dynamic QR menu isn't just setup flexibility. Build a pre-event habit: review and update your menu the evening before each event. Hide sold-out items before the rush, add a same-day special without touching your signage.
Common Mistakes to Avoid
- Using a static QR code: Any URL change — switching platforms, updating links — requires a completely new code. Dynamic codes eliminate this problem entirely.
- Placing the code only at the window: By then, customers have waited without knowing what they want. Put it at the line entry point.
- Linking to a non-mobile-optimized page: Full-size PDFs, desktop-formatted websites, and image-heavy pages that time out on cellular will frustrate customers. Test your menu link on a mobile browser before going live.
- Skipping weatherproofing: Paper signage degrades within days outdoors. Vinyl or laminated signage is a one-time investment that pays off immediately.
- Not testing before the first event: Scan your code on multiple phone models, in outdoor lighting, and from different distances.
Frequently Asked Questions
Do I need to provide WiFi at my food truck for the QR menu to work?
No — customers use their own mobile data to load your menu. You don't need to provide WiFi. This is exactly why keeping your menu page lightweight matters: it needs to load quickly on a cellular connection, not a fast local network.
What should my QR code link to — a PDF, a website, or a menu app?
PDFs require re-uploading for every update and display poorly on mobile. A website gives full control but needs ongoing maintenance. For operators who change their menu regularly, a dedicated digital menu platform is the fastest to update and mobile-optimized by default.
Can I use the same QR code at different locations and events?
Yes. A single dynamic QR code works at any location. Print it once on a sticker or sign, and it always displays your current menu — regardless of how many times you've updated the content behind it.
What's the difference between a static and dynamic QR code for a food truck?
A static code has a permanently encoded destination — once printed, it can't be changed. A dynamic code points to a redirect URL, letting you update the destination through a dashboard without reprinting the physical code.
How large should the QR code be on my food truck signage?
At minimum, 4–6 inches square for queue-side scanning from a few feet away. For signage mounted on the truck's exterior, 12 inches or larger ensures visibility from the back of a longer line.
How do I make my QR code signage weatherproof for outdoor use?
Use vinyl stickers, laminated prints, or plastic/acrylic signs. Standard paper prints degrade quickly in rain, sunlight, and wind. Vinyl graphic films designed for outdoor use can maintain quality for years on flat vertical surfaces.